## 内容回顾 ### 两个视图基类 APIView GenericAPIView:跟数据库打交道,而且需要序列化反序列化,可以使用它 ### 5个视图扩展类+GenericAPIView=视图类 ListModelMixin CreateModelMixin RetrieveModelMixin UpdateModelMixin DestroyModelMixin 正常需要写两个视图类,实现5个接口 ```python BookView:list,create BookDetailView:retrieve,destroy,update ``` 5个接口只想新增和更新–》两个视图类 如果配合自动生成路由: ViewSetMixin+list+update+GenericAPIView可以写到一个视图类中 5个接口:自动生成路由+5个视图扩展类+GenericAPIView>>一个视图类即可 ### 9个视图子类 视图类 5个,两两组合,三个组合 listcreate,retrieveupdate,retrievedestroy,retrieveupdatedestroy ### 视图集 ModelViewSet ReadOnlyModelViewSet ViewSetMixin:不是视图类,配合视图类一个用,重写了as_view>>路由写法变了》》本质就是通过传的actions作映射\ {'get':"xxx"} 传action方式 自动生成方法 继承APIView+自动生成路由》》ViewSet 继承GenericAPIView+自动生成路由》》GenericViewSet 引申出来:后期在视图类中的方法,可以任意命名,只要做好映射,或自动生成即可 ### 路由组件 #### 三种写法 ##### 传统写法:不继承ViewSetMixin及其子类的 #### 映射写法:传actions{'get':"xxx"} #### 自动生成写法:两个类,加入到路由中:两种(include,列表直接加) action装饰器 自动生成路由时,做成生成,装饰在视图类的方法上 @action(methods=['POST','GET'],detail=False) ### 登录接口》》自动生成路由 ViewSetMixin+APIView login>使用action装饰器装饰》》post请求 取出前端传入的数据(三种格式都可以)》》request.data 写逻辑判断是否登录成功》》UserToken存储登录状态 如果存在修改,不存在新增 最后返回给前端 ## 今日内容 ### 认证组件 以后,有的接口需要登录后才能访问,有的接口,不登录就能访问 登录认证的限制 写一个登录接口,返回token,以后只要带着token过来,就是登录了,不带,就没有登录 查询所有不需要登录就能访问 查询单个,需要登录才能访问 ### 登录代码 ```python class UserView(ViewSet): authentication_classes = [] # 如果配置了全局认证,这里局部取消认证 @action(methods=['POST'], detail=False) def login(self, request, *args, **kwargs): re_dict = {'code': 100, 'msg': ''} username = request.data.get('username', None) password = request.data.get('password', None) print(username) print(password) user = User.objects.filter(username=username, password=password).first() if user: token = str(uuid.uuid4()) UserToken.objects.update_or_create(user=user, defaults={'token': token}) re_dict['msg'] = '登录成功' re_dict['token'] = token return Response(re_dict) else: re_dict['code'] = 101 re_dict['msg'] = '用户名或密码错误' return Response(re_dict) ``` 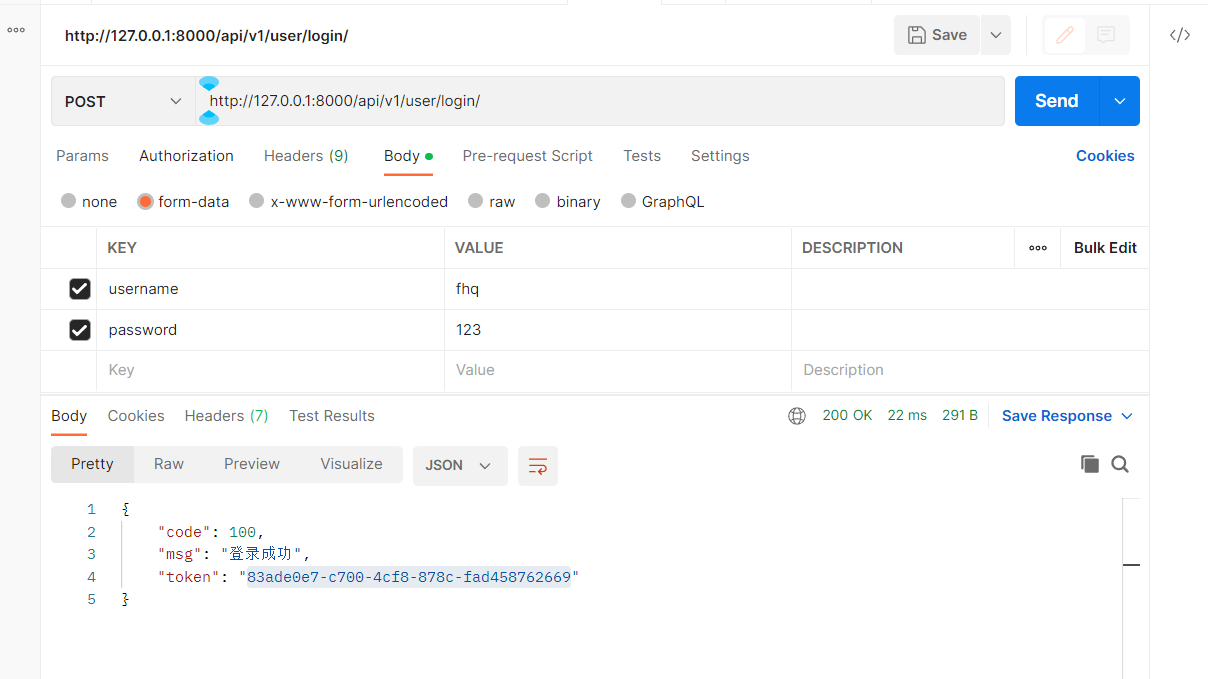 #### 认证组件使用步骤 1. ##### 写一个认证类,继承BaseAuthentication 2. ##### 重写authenticate方法,在该方法中实现登录认证:token携带在地址栏中 3. ##### 如果认证成功,返回两个值user对象,token【返回None或两个值】 4. ##### 认证不通过,抛出异常AuthenticationFailed 5. ##### 局部使用和全局使用 ###### 局部:只在某个视图类中使用【当前视图类管理的所有接口】 ```python class BookDetailView(ViewSetMixin, RetrieveAPIView): authentication_classes = [LoginAuth] ``` ###### 全局:全局所有接口都生效(登录接口不要) ```python REST_FRAMEWORK = { 'DEFAULT_AUTHENTICATION_CLASSES': [ 'rest_framework.authentication.SessionAuthentication', 'rest_framework.authentication.BasicAuthentication', 'app01.authentication.CommenAuthentication', ], } ``` ###### 局部禁用: ```python class BookDetailView(ViewSetMixin, RetrieveAPIView): authentication_classes = [] ``` #### 代码 ##### 查所有 ```python # 查询所有 class BookView(ViewSetMixin, ListAPIView): queryset = Book.objects.all() serializer_class = BookSerializer ``` 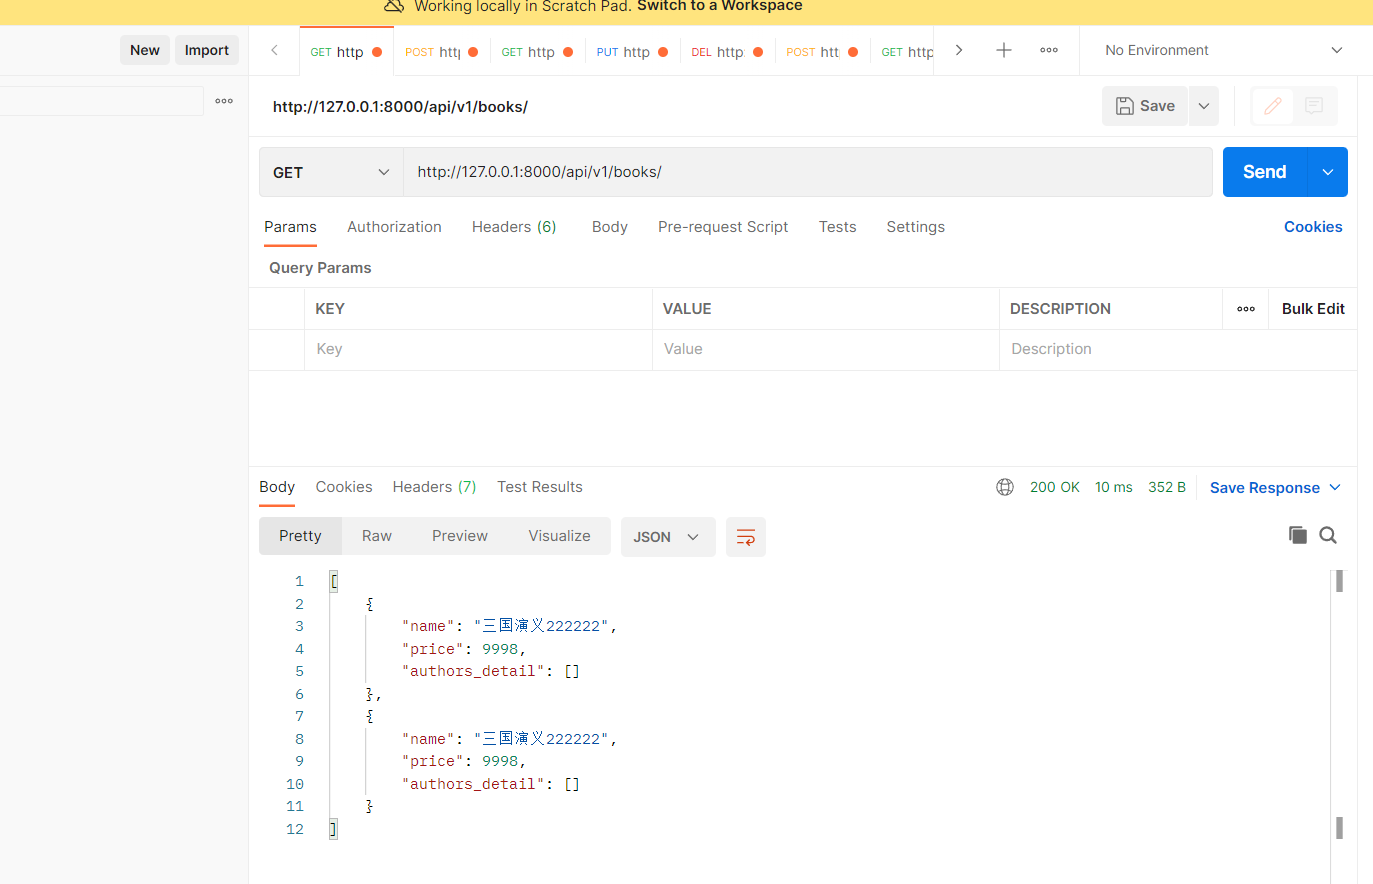 ##### 查单个 ###### 方式一装饰器 ```python from rest_framework.decorators import authentication_classes @authentication_classes([CommenAuthentication]) # 只能放在类头上的 class BookViewDetail(GenericViewSet, RetrieveAPIView): queryset = Book.objects.all() serializer_class = BookSerializer ``` ###### 方式二类属性 ```python class BookDetailView(ViewSetMixin, RetrieveAPIView): queryset = Book.objects.all() serializer_class = BookSerializer authentication_classes = [CommenAuthentication] # 需要写一个认证类,需要咱们写 ``` 原理是一样的 ```python def authentication_classes(authentication_classes): def decorator(func): func.authentication_classes = authentication_classes # 这里就是给类添加属性 return func return decorator ``` ##### 认证类代码 ```python class LoginAuth(BaseAuthentication): def authenticate(self, request): # 在这里实现认证,如果是登录的,继续往后走返回两个值,如果不是抛异常 # 请求中是否携带token,判断是否登录,放在地址栏中 token = request.query_params.get('token', None) if token: # 前端传入token了,去表中查,如果能查到,登录了,返回两个值[固定的:当前登录用户,token] user_token = UserToken.objects.filter(token=token).first() if user_token: return user_token.user, token else: # 没有登录抛异常 raise AuthenticationFailed('token认证失败') else: raise AuthenticationFailed('token没传') ``` ##### 路由 ```python from rest_framework.routers import SimpleRouter, DefaultRouter from django.urls import include router = SimpleRouter() router.register('books', views.BookViwe, 'books') router.register('user', views.UserView, 'login') router.register('books', views.BookViewDetail, 'book') urlpatterns = [ path('api/v1/', include(router.urls)) ] ``` 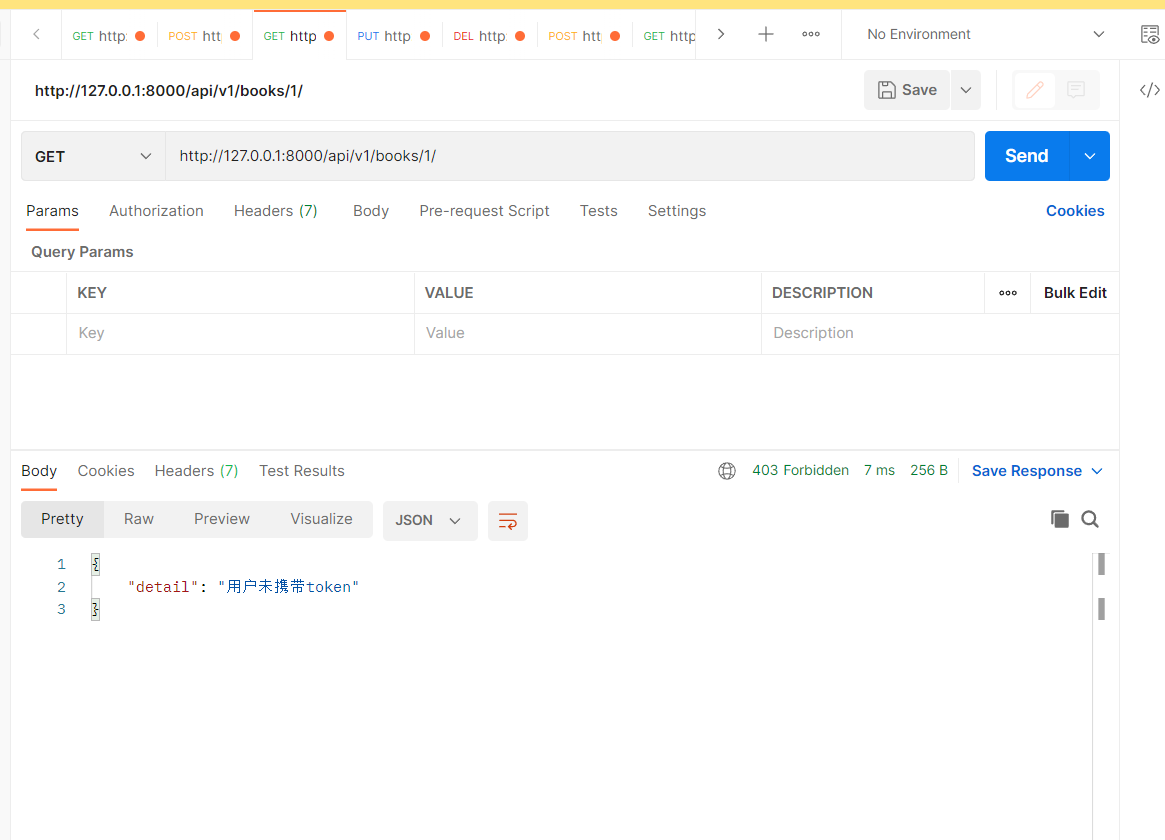 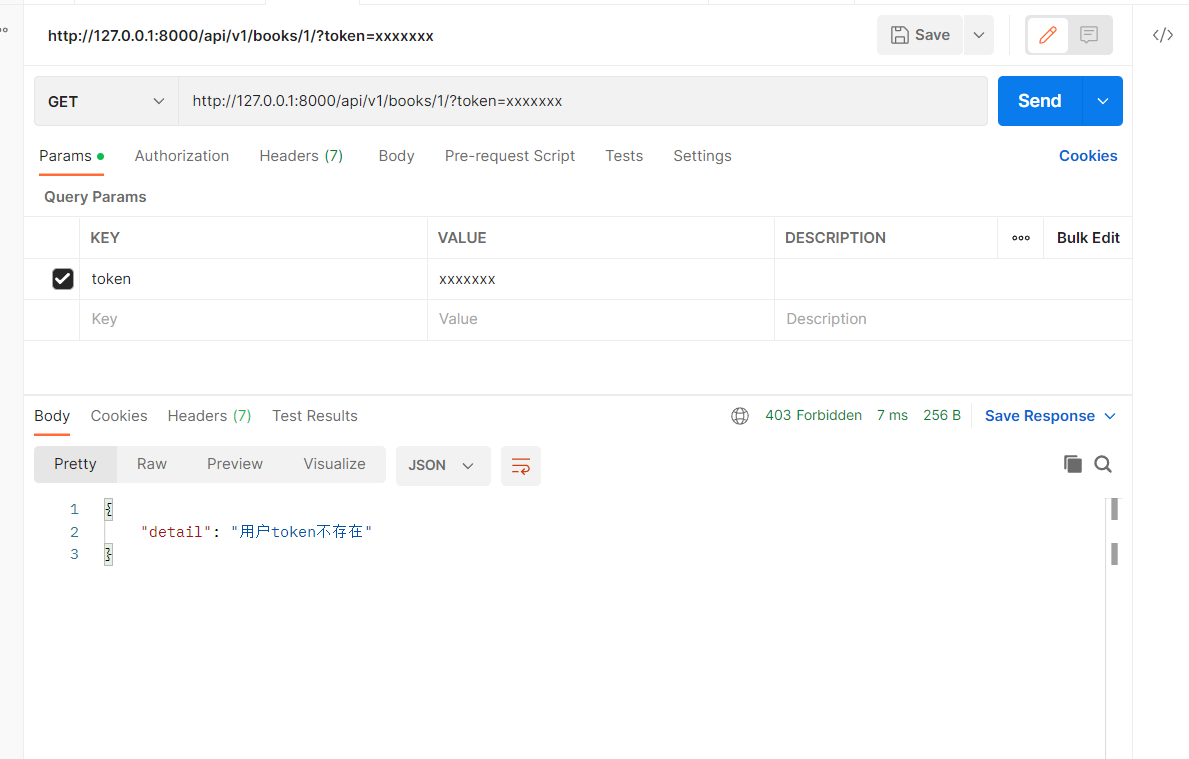 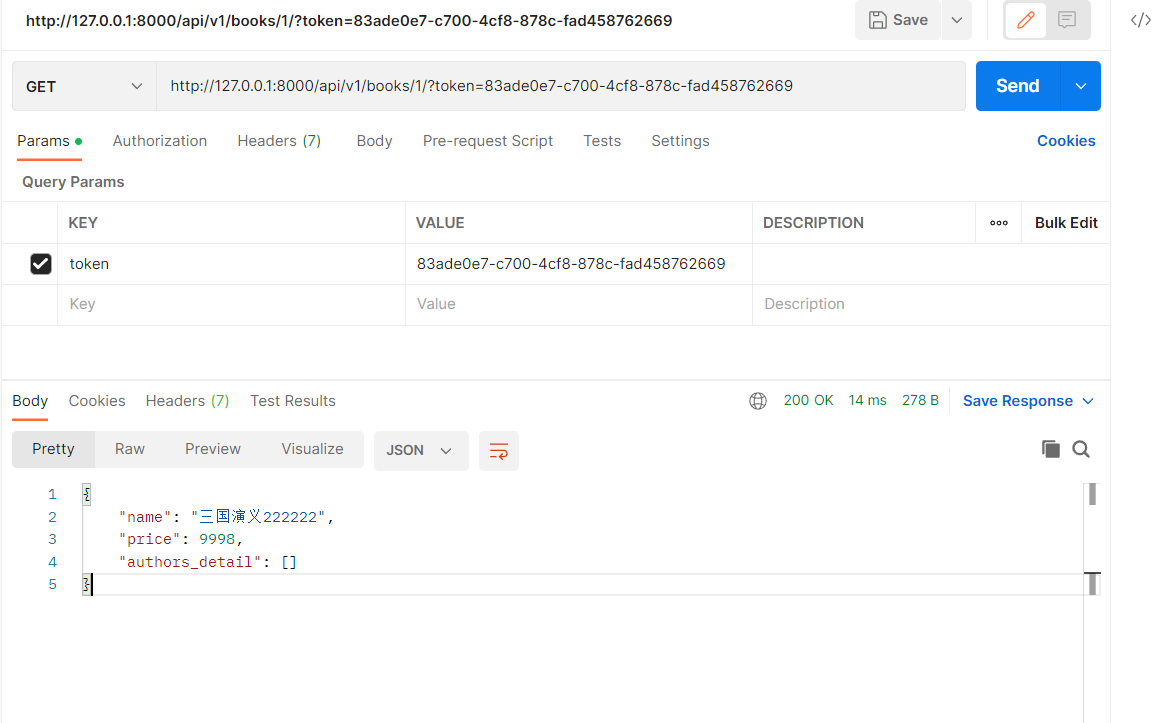 ##### 坑:不要再配置文件中乱导入不使用的东西,否则会报错 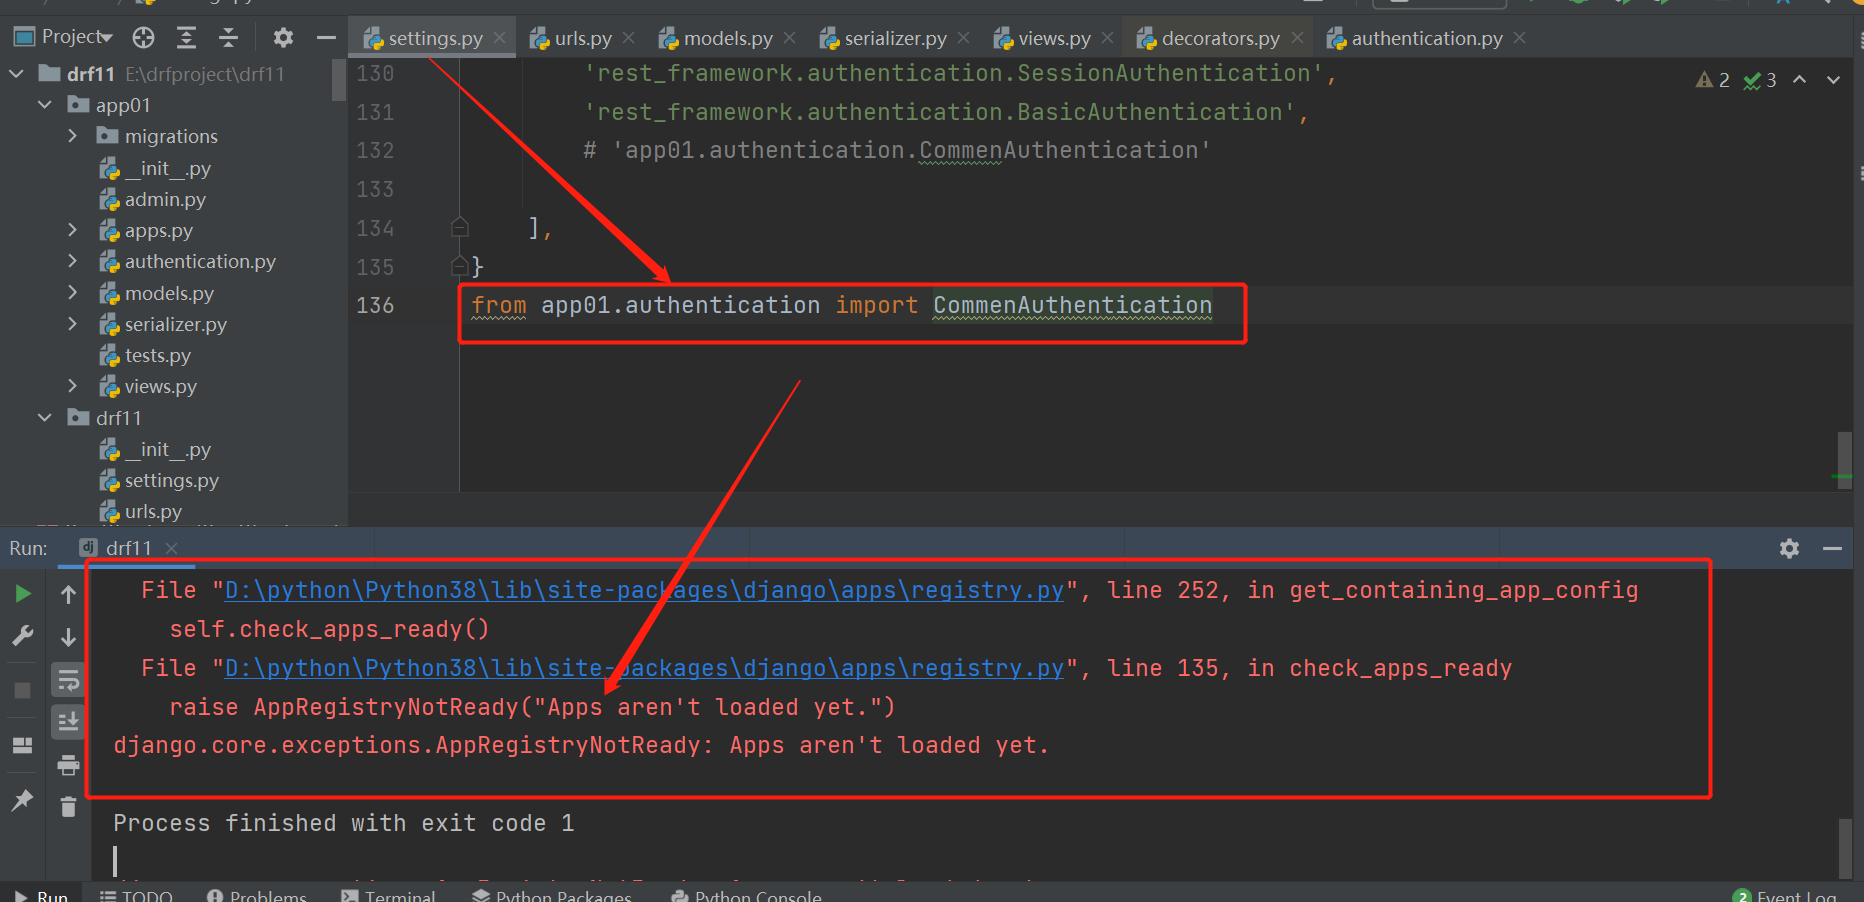 ### 权限组件 即便登录成功了,有写接口,还是不能访问,因为没有访问权限 登录后,有的接口有权限访问,有的没有权限访问 查询单个和查询所有,都要登录才能访问–》》全局认证 查询单个需要超级管理员才能访问 查询说有,所有登录用户都能访问 权限是一个字段,再User表中,加入user_type字段 #### 权限的使用 1. 写一个权限类,继承BasePermission 2. ##### 重写has_permission方法,在该方法在中实现权限认证,在这方法中,request.user就是当前登录用户 3. ##### 如果有权限返回True 4. ##### 没有权限,返回False,定制返回的中文:self.message=‘中文’ 5. ##### 局部使用和全局和使用 ###### 局部:只在某个视图类中使用【当前视图类管理的所有接口】 ```python class BookDetailView(ViewSetMixin, RetrieveAPIView): permission_classes = [CommonPermission] ``` ###### 全局:全局所有接口都生效 ```python REST_FRAMEWORK = { 'DEFAULT_PERMISSION_CLASSES': [ 'app01.permissions.CommonPermission', ], } ``` ###### 局部禁用: ```python class BookDetailView(ViewSetMixin, RetrieveAPIView): permission_classes = [] ``` #### 代码 ```python permission.py from rest_framework.permissions import BasePermission from .models import User class CommonPermission(BasePermission): def has_permission(self, request, view): user = request.user print(type(user)) #如果没写认证类user 是AnonymousUser这个 <class 'django.contrib.auth.models.AnonymousUser'> if user.usertype == 3: return True else: self.message = '对不起您是%s' % user.get_usertype_display() return False views.py @authentication_classes([CommenAuthentication]) # 只能放在类头上的 class BookViewDetail(GenericViewSet, RetrieveAPIView): permission_classes = [CommonPermission, ] queryset = Book.objects.all() serializer_class = BookSerializer models.py class User(models.Model): username = models.CharField(max_length=32) password = models.CharField(max_length=32) usertype = models.IntegerField(choices=((1, '游客用户'), (2, '普通用户'), (3, '超级管理')), default=1) # 1游客用户,2普通用户,3超级管理员 ``` 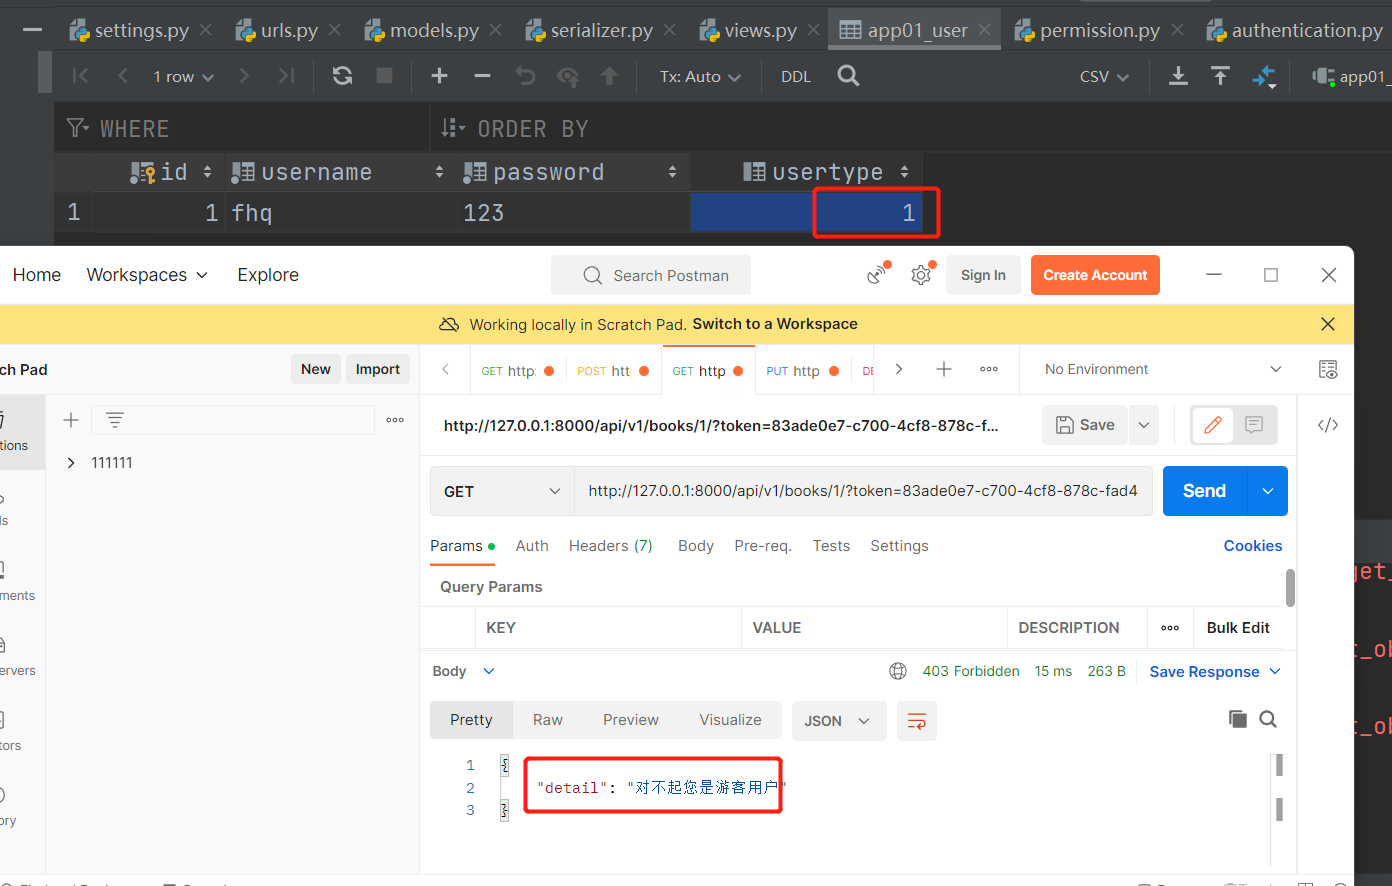  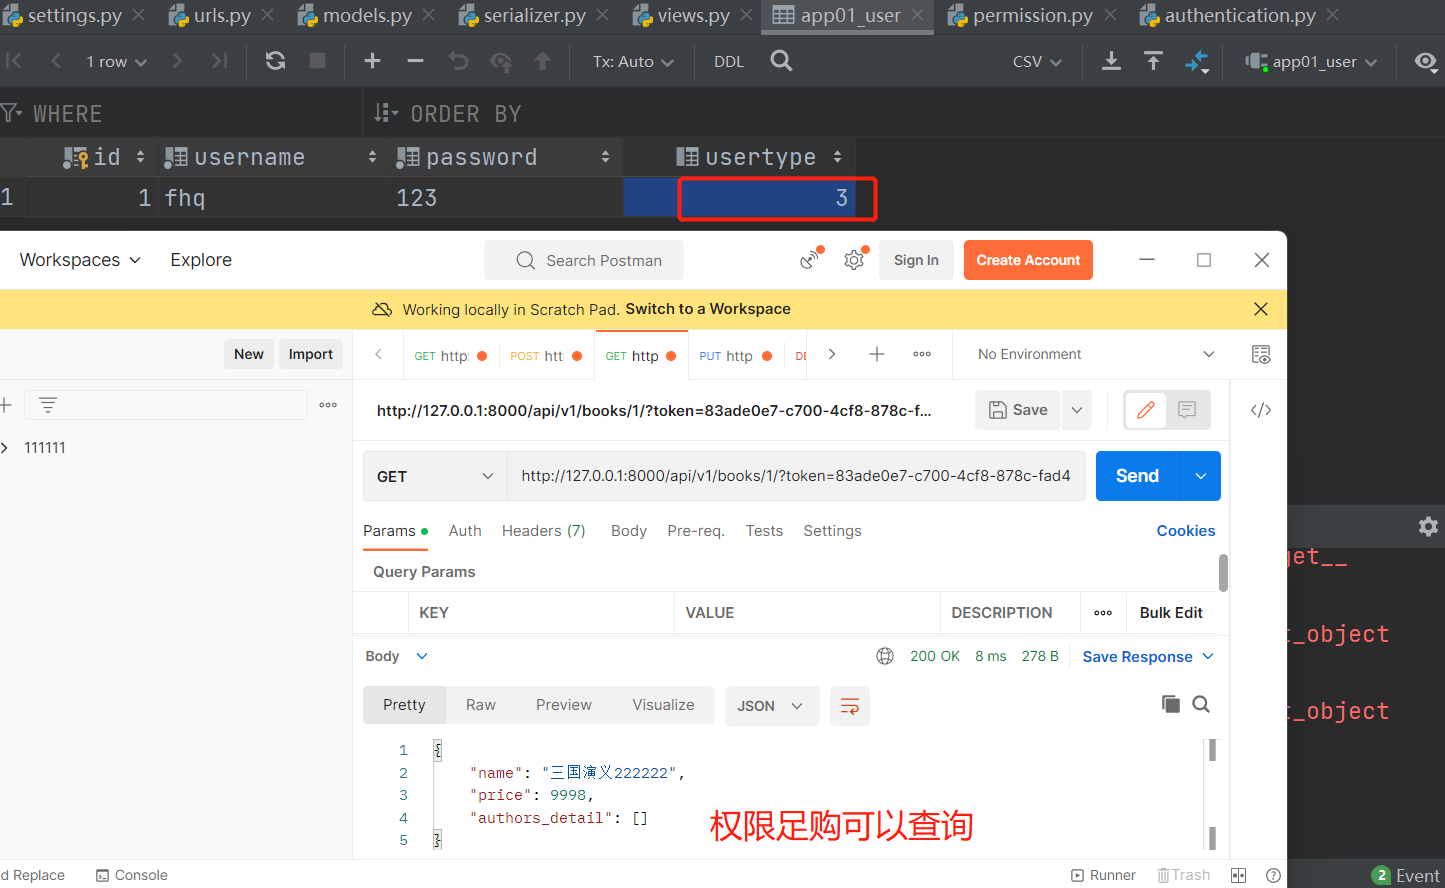 ### 频率组件 控制某个接口访问频率(次数) 查询所有接口,同一个ip一分钟只能访问5次 可以单独使用,单独使用时要以`ip`为唯一字段 #### 使用步骤 1. ##### 写一个频率类,继承SimpleRateThrottle 2. ##### 重写get_cache_key方法,返回什么,就是以什么做限制–》》ip,用户id做限制 3. ##### 配置一个类属性:scope=‘book_5_m’这个是别名 4. ##### 再配置文件中配置 ```python 'DEFAULT_THROTTLE_RATES': { 'book_5_m': '5/m', }, ``` 5. ##### 局部使用和全局使用 ###### 局部:只要再某个视图类中使用【当前视图类管理的所有接口】 ```python @authentication_classes([CommenAuthentication]) # 只能放在类头上的 认证 class BookViewDetail(GenericViewSet, RetrieveAPIView): permission_classes = [CommonPermission, ] #权限 throttle_classes = [Commonthrottling,]#频率 queryset = Book.objects.all() serializer_class = BookSerializer ``` ###### 全局:全局所有接口都生效 ```python REST_FRAMEWORK = { 'DEFAULT_THROTTLE_CLASSES': ['app01.throttling.CommonThrottle'], } ``` ###### 局部禁用: ```python class BookDetailView(ViewSetMixin, RetrieveAPIView): throttle_classes = [] ``` #### 代码 ```python viwes.py @authentication_classes([CommenAuthentication]) # 只能放在类头上的 class BookViewDetail(GenericViewSet, RetrieveAPIView): permission_classes = [CommonPermission, ] throttle_classes = [Commonthrottling,] queryset = Book.objects.all() serializer_class = BookSerializer throttling.py from rest_framework.throttling import SimpleRateThrottle class Commonthrottling(SimpleRateThrottle): scope = 'book_5_m' # 别名要与settings中的对应 def get_cache_key(self, request, view): ip = request.META.get('REMOTE_ADDR') return ip # print(request.META.get('REMOTE_ADDR')) 返回唯一字段 # return request.user.pk settings.py REST_FRAMEWORK = { 'DEFAULT_THROTTLE_RATES': { 'book_5_m':'5/m' }, } ``` 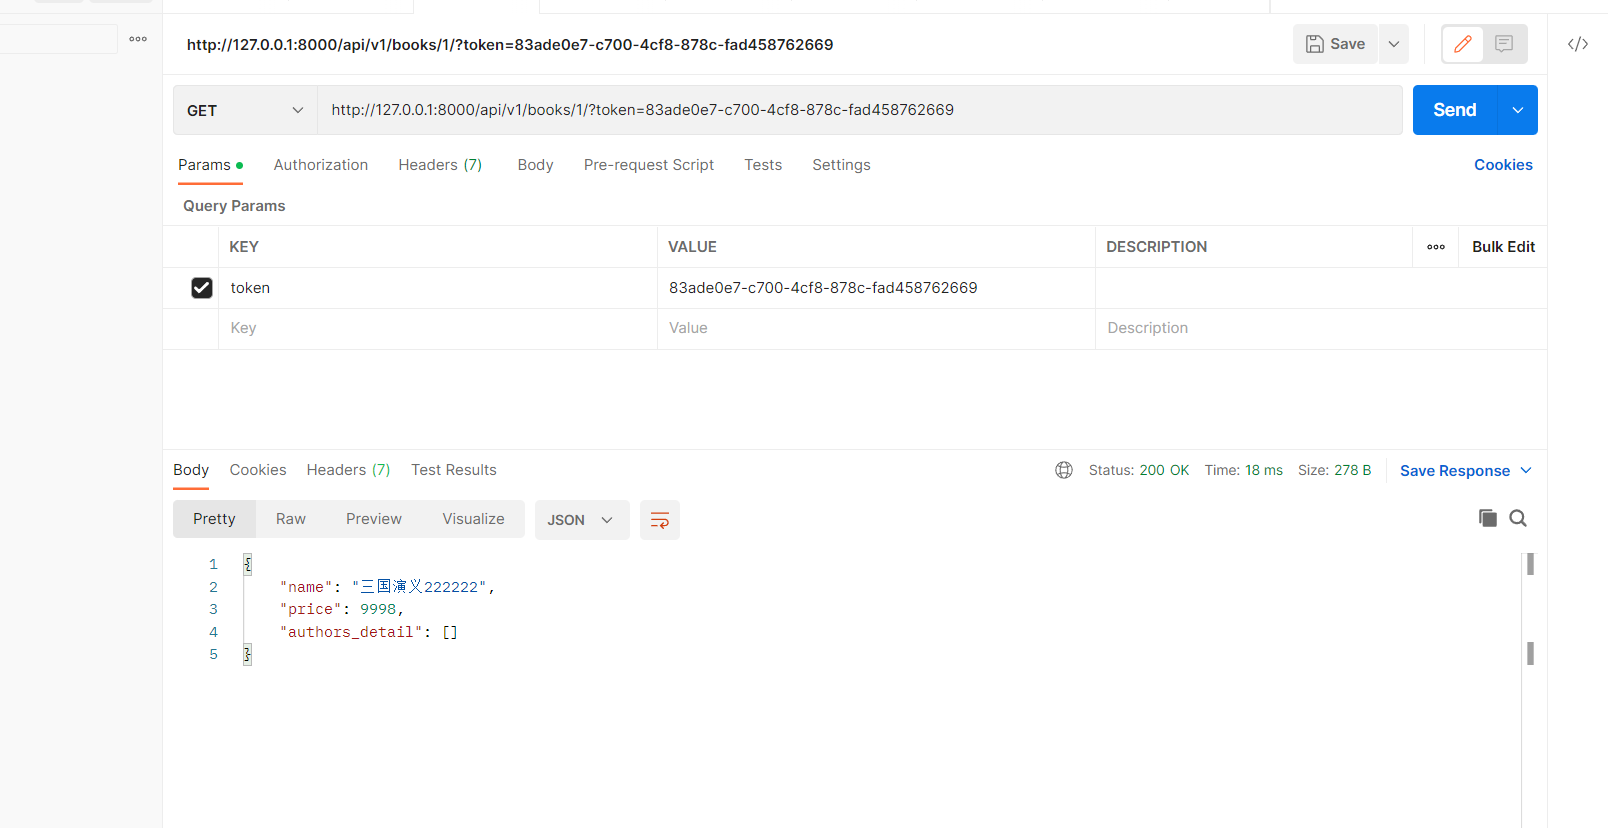  ### 过滤排序 restfull规范中,要求了,请求地址中带过滤条件 5个接口中,只有一个接口需要有过滤和排序,查询所有接口 查询 所有图书接口,查询以 红 开头的所有图书 #### 继承APIView自己写 ```python ``` #### 1.内置过滤类的使用【继承GenericAPIView】 ```python class BookViwe(GenericViewSet, ListAPIView): # authentication_classes = [] queryset = Book.objects.all() # SearchFilter内置的,固定用法,模糊匹配 # 就有过滤功能了,指定按那个字段过滤 serializer_class = BookSerializer filter_backends = [SearchFilter] # search_fields = ['name'] #可以按名字模糊匹配 search_fields = ['name','price'] # 按名字或价格模糊匹配 ``` 可以使用的搜索方式 ```python http://127.0.0.1:8000/api/v1/books/?search=红 # name或price中只要有红就会搜出来 http://127.0.0.1:8000/api/v1/books/?search=998 # name或price中只要有998就会搜出来 ``` 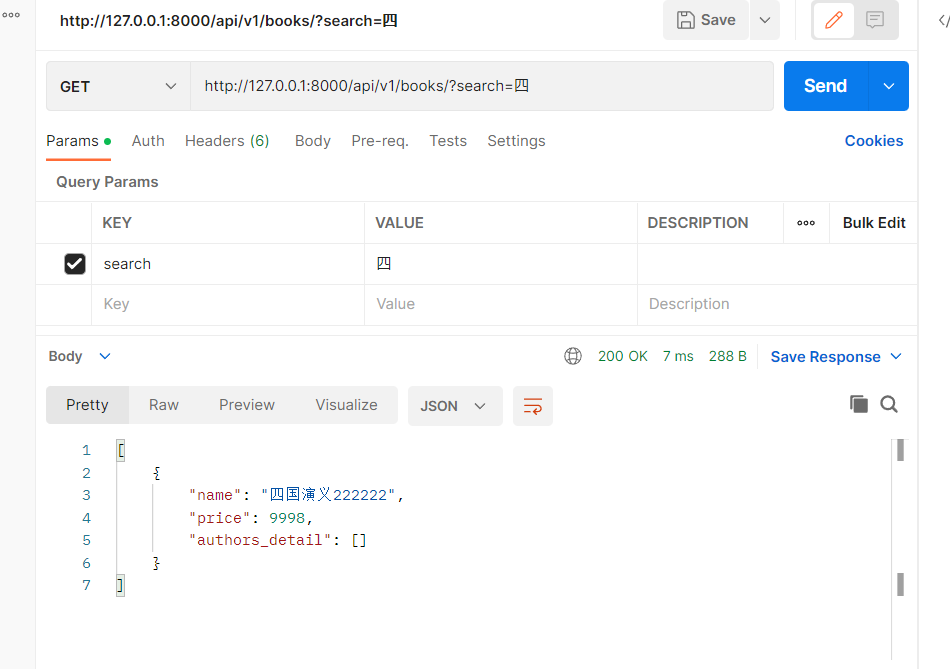 #### 2.使用第三方django-filter实现过滤 安装pip install django-filter 如果django版本低于3.2会自动升级django版本,官网说不支持3.2以下的,但是可以支持2.2,安装完毕后,我们自己再降会来就行了 ```python from django_filters.rest_framework import DjangoFilterBackend class BookViwe(GenericViewSet, ListAPIView): # authentication_classes = [] queryset = Book.objects.all() serializer_class = BookSerializer filter_backends = [DjangoFilterBackend] filterset_fields = ['name','price'] # 精准匹配,可以一个一个匹配,也可以两个一起匹配 ``` 可以使用的搜索方式 ```python 1.http://127.0.0.1:8000/api/v1/books/?name=三国演义222222 2.http://127.0.0.1:8000/api/v1/books/?price=9998 3.http://127.0.0.1:8000/api/v1/books/?price=9998&name=三国演义222222 ``` 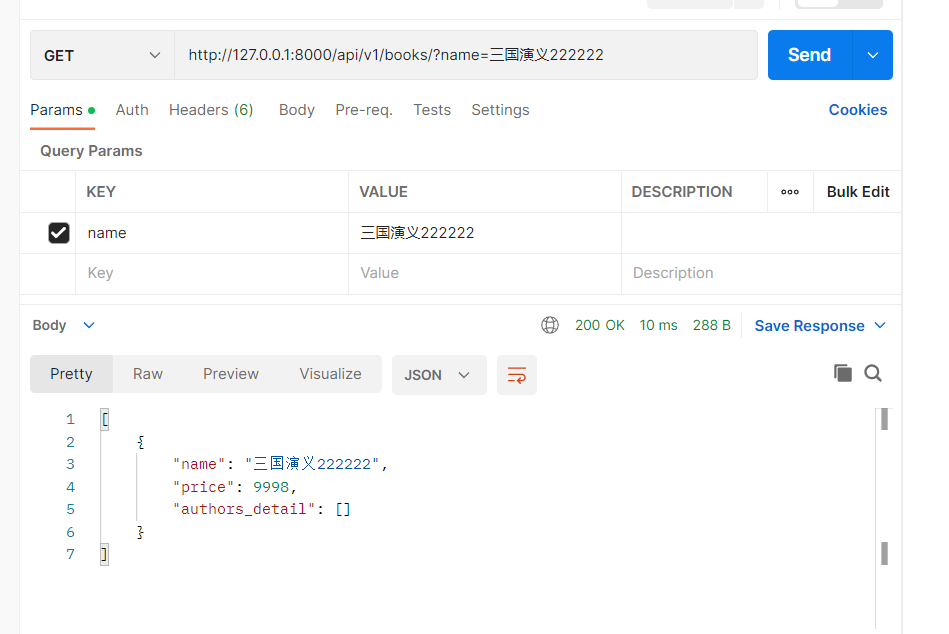 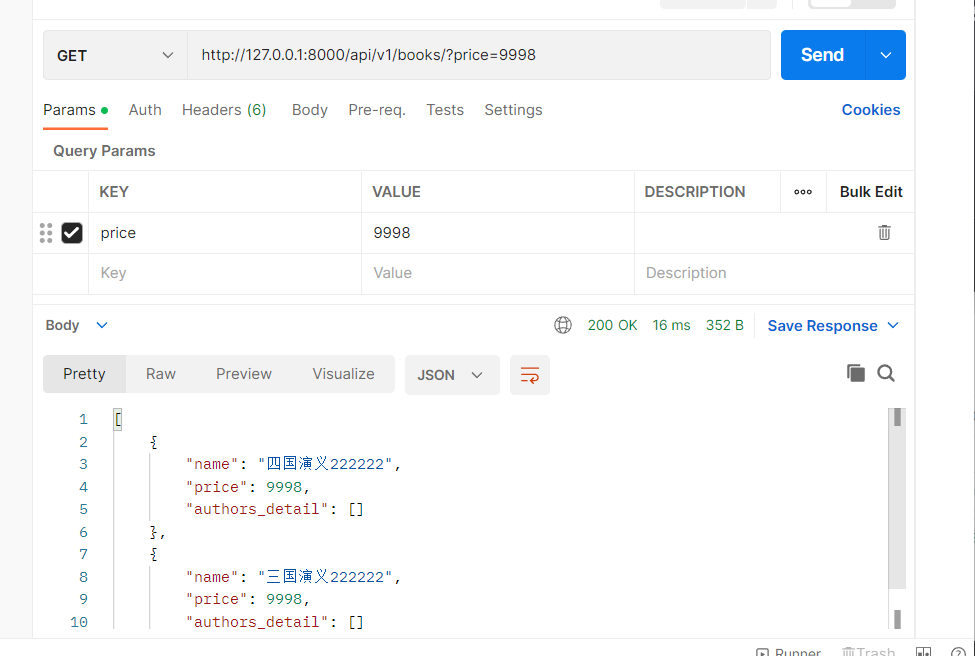 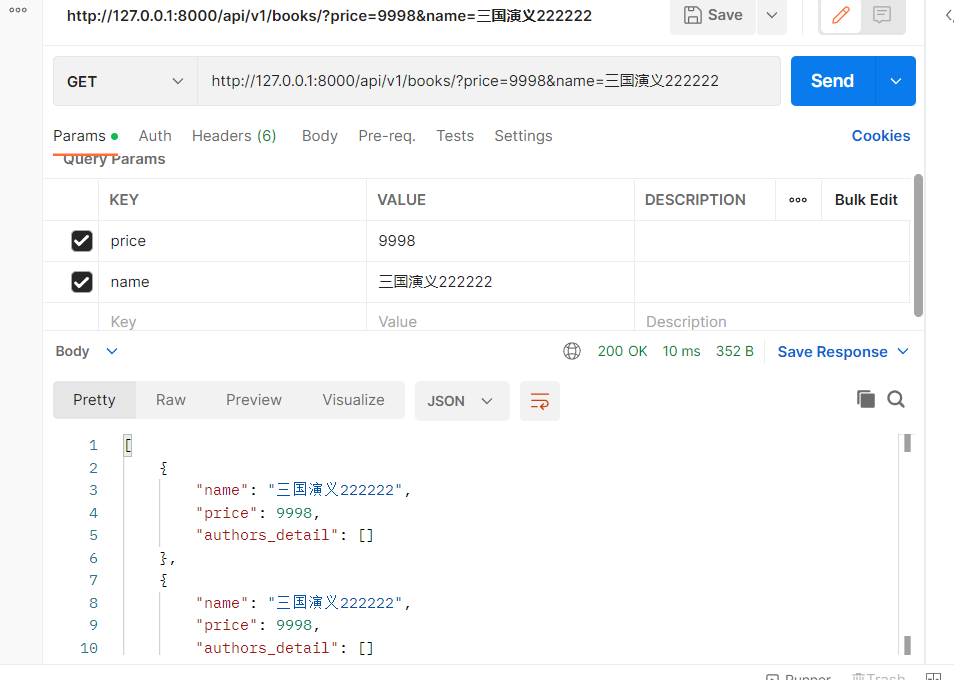 #### 3.自己定制过滤类实现过滤 查询价格大于100的所有图书 第一步:定义一个过滤类,继承BaseFilterBackend,重写filter_queryset方法 ```python from rest_framework.filters import BaseFilterBackend class CommonFilter(BaseFilterBackend): def filter_queryset(self, request, queryset, view): price_gt = request.query_params.get('price_gt',None) if price_gt: #在里面实现过滤,返回qs对象,就是过滤后的数据 return queryset.filter(price__gt=price_gt) return queryset ``` 第二部配置在视图类上 ```python from .filter import CommonFilter class BookViwe(GenericViewSet, ListAPIView): # authentication_classes = [] queryset = Book.objects.all() serializer_class = BookSerializer filter_backends = [CommonFilter] # 可以定制多个,从左到右,依次执行 ``` 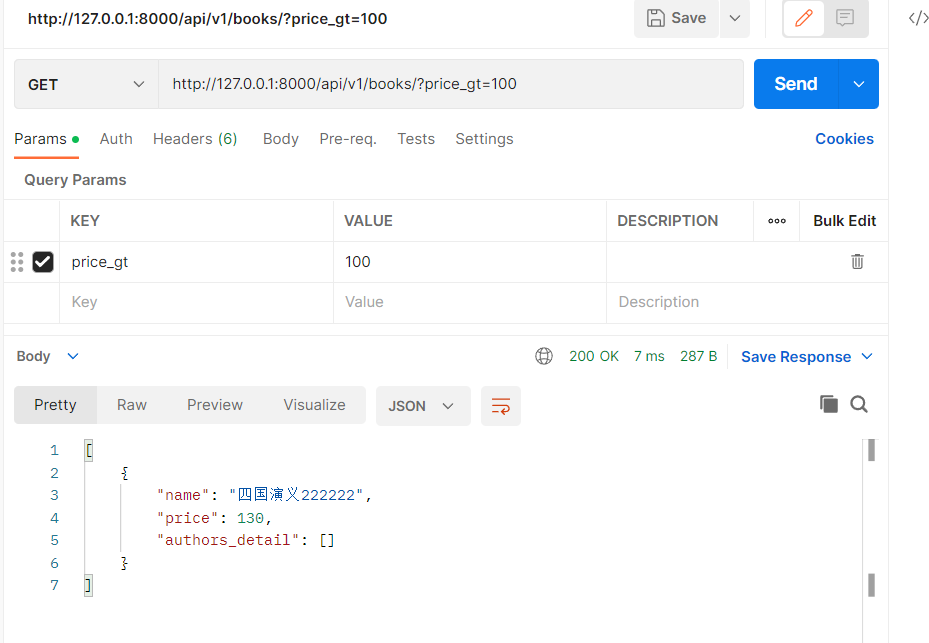 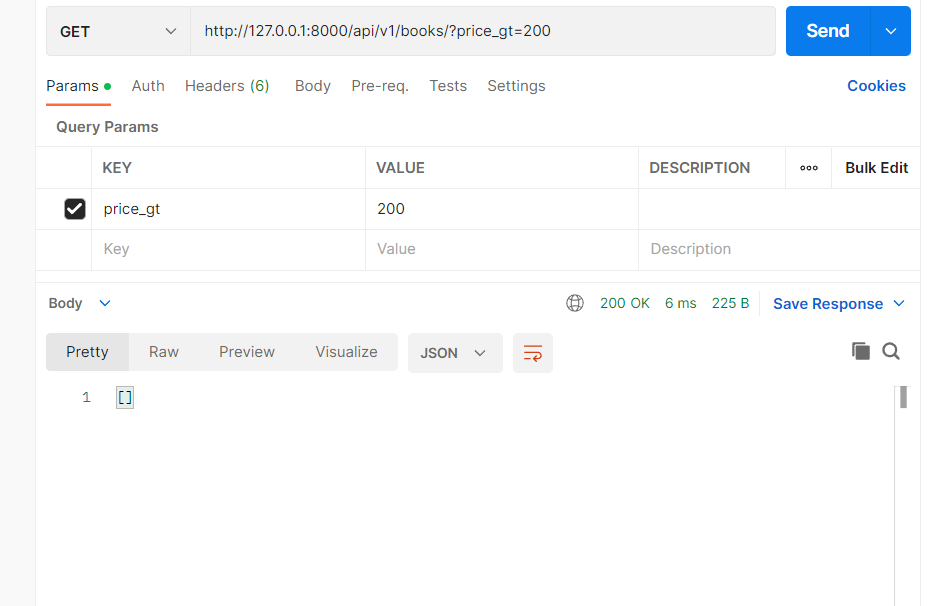 搜索方式 ```python http://127.0.0.1:8000/api/v1/books/?price_gt=200 ``` #### 排序的使用 使用内置 ```python from .filter import CommonFilter from rest_framework.filters import OrderingFilter class BookViwe(GenericViewSet, ListAPIView): # authentication_classes = [] queryset = Book.objects.all() serializer_class = BookSerializer filter_backends = [CommonFilter, OrderingFilter] ordering_fields = ['price','id'] ``` 查询方法 ```python http://127.0.0.1:8000/api/v1/books/?ordering=price http://127.0.0.1:8000/api/v1/books/?ordering=-price http://127.0.0.1:8000/api/v1/books/?ordering=-id,price http://127.0.0.1:8000/api/v1/books/?ordering=-price,-id ``` 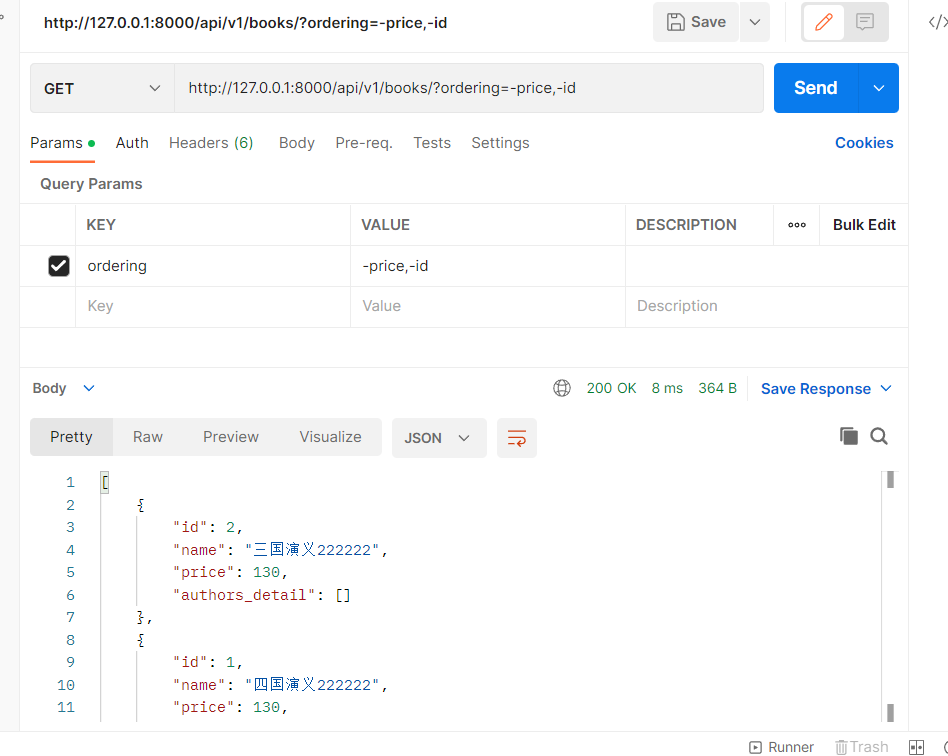 ### 分页 分页,只有查询所有接口,才分页 drf内容了三个分页器,对应三种分页方式 分页器,query_set需要写全all()不能不写 内置的分页类不能直接使用,需要继承,定制一些参数后才能使用 #### 方式一PageNumberPagination 基本分页方式(基本是这种,网页端):http://127.0.0.1:8000/api/v1/books/?page=2&size=3 pagination.py ```python from rest_framework.pagination import PageNumberPagination class CommonPageNumber(PageNumberPagination): page_size = 2 # 默认显示条数 page_query_param = 'page' # 分页参数名 page_size_query_param = 'size' # 分大小参数名一个页面显示条数 max_page_size = 5 # 最大一个页面显示条数 ``` views.py ```python class BookViwe(GenericViewSet, ListAPIView,CreateAPIView): queryset = Book.objects.all() serializer_class = BookSerializer pagination_class = CommonPageNumber ``` 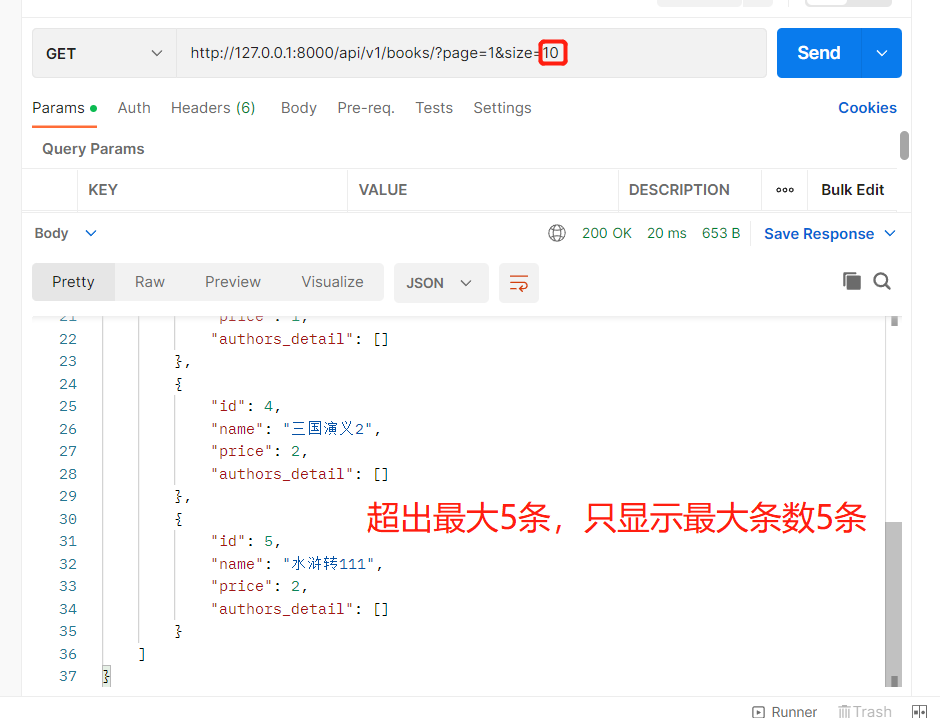 #### 方式二(LimitOffset) 偏移分页 http://127.0.0.1:8000/api/v1/books/?limit=4&offset=1 从第一条开始,取4条 ```python class CommonLimitOffset(LimitOffsetPagination): default_limit = 2 # 每页显示2条 limit_query_param = 'limit' # limit=3 取3条 offset_query_param = 'offset' # offset=1 从第一个位置开始,取limit条 max_limit = 5 ``` ```python from .filter import CommonFilter from rest_framework.filters import OrderingFilter from .pagination import CommonPageNumber,CommonLimitOffset class BookViwe(GenericViewSet, ListAPIView,CreateAPIView): # authentication_classes = [] queryset = Book.objects.all() serializer_class = BookSerializer filter_backends = [CommonFilter, OrderingFilter] ordering_fields = ['price','id'] # pagination_class = CommonPageNumber pagination_class = CommonLimitOffset # 可以和分页排序一起使用 ``` 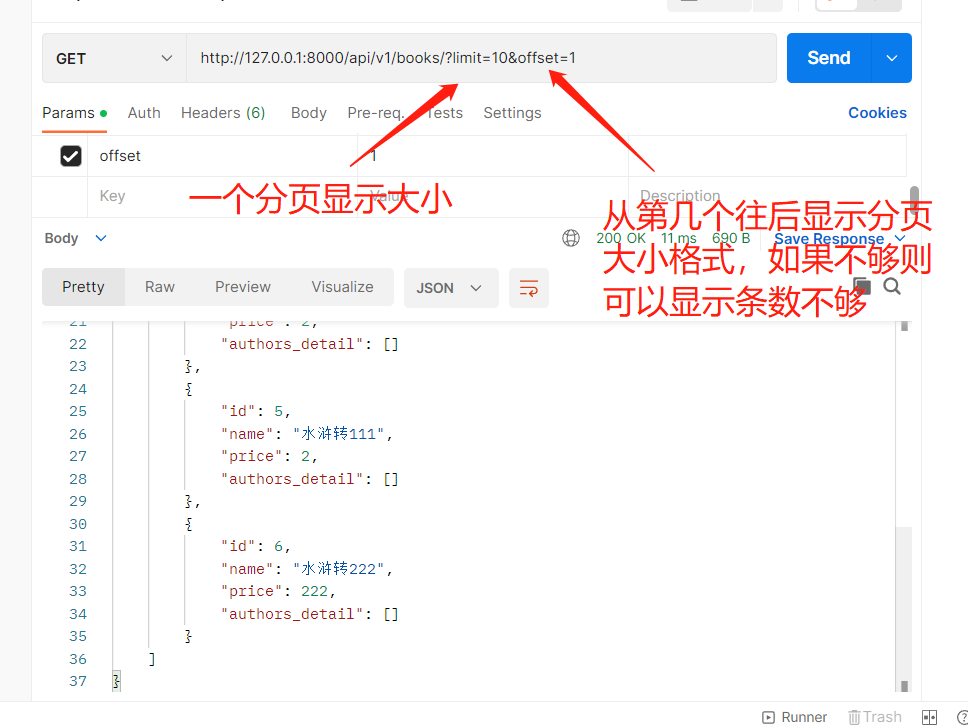 #### 方式三(游标方式) app经常用 游标分页,只能下一页,上一页,不能跳到中间,但它的效率最高,大数据量分页,使用这种较好 ```python class CommonCursor(CursorPagination): cursor_query_param = 'cursor' page_size = 3 ordering = 'id' ``` ```python from rest_framework.filters import OrderingFilter from .pagination import CommonPageNumber,CommonLimitOffset,CommonCursor class BookViwe(GenericViewSet, ListAPIView,CreateAPIView): # authentication_classes = [] queryset = Book.objects.all() serializer_class = BookSerializer filter_backends = [CommonFilter, OrderingFilter] ordering_fields = ['price','id'] # pagination_class = CommonPageNumber # 方式一 # pagination_class = CommonLimitOffset # 方式二可以和分页排序一起使用 pagination_class = CommonCursor # 方式三 ```  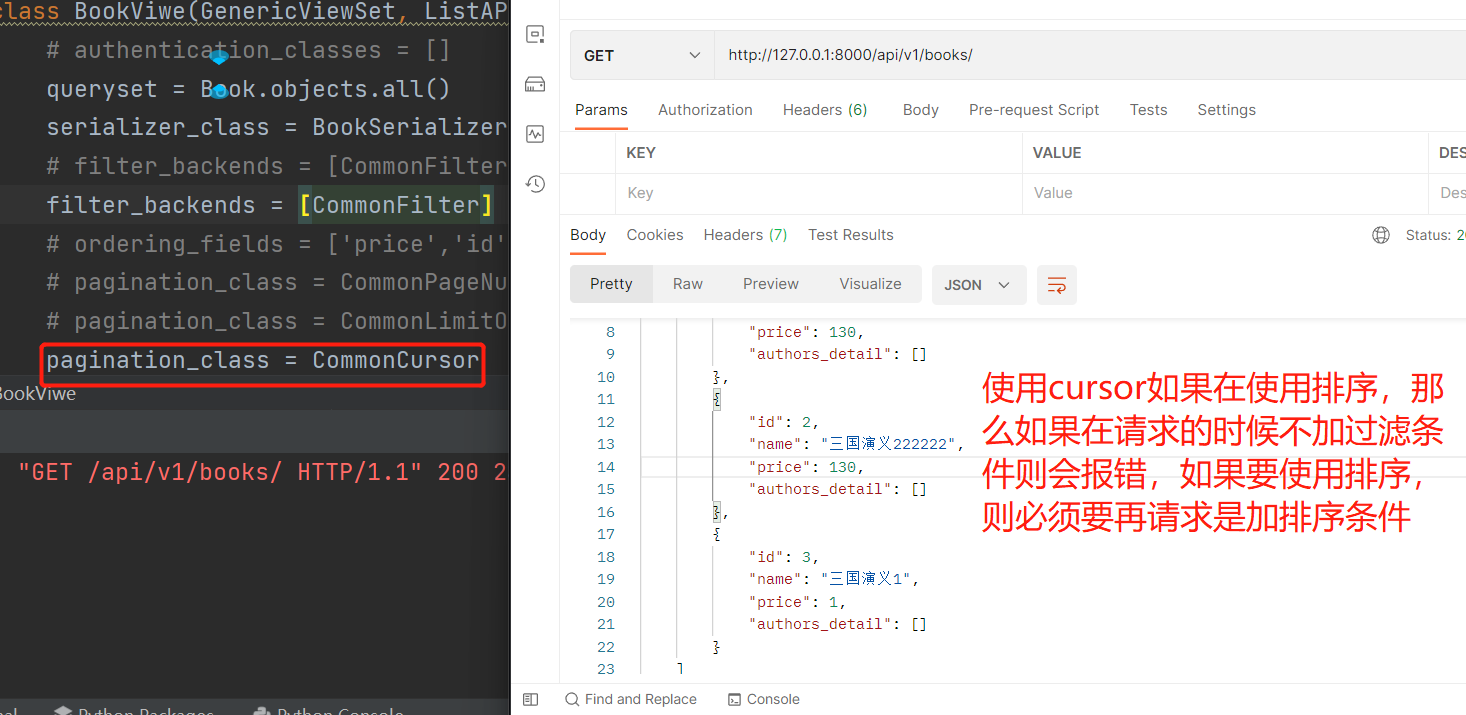 ## 练习 ```python # 编写认证类,权限类,频率类,登录接口 -所有接口,一分钟访问10次 -查询所有图书和查询单条图书不登录可以访问 -新增,删除,修改必须登录后才能访问 -删除功能只有超级管理员能删除 ``` urls.py ```python from django.contrib import admin from django.urls import path, include from django.views.static import serve from django.conf import settings from app01 import views from rest_framework.routers import SimpleRouter router = SimpleRouter() router.register('bookdestroy', views.BookSuperView, 'super') router.register('bookupdate', views.BookLoginView, 'create') router.register('bookselect', views.BookView, 'books') router.register('user', views.UserView, 'login') urlpatterns = [ path('admin/', admin.site.urls), path('media/', serve, {'document_root', settings.MEDIA_ROOT}), path('api/v1/', include(router.urls)), ] ``` views.py ```python from django.shortcuts import render # Create your views here. from rest_framework.generics import ListAPIView, RetrieveAPIView, UpdateAPIView, DestroyAPIView, CreateAPIView from rest_framework.viewsets import ViewSetMixin from .models import Book, User, UserToken from .serializer import BookSerializer from .authentication import Myauthenticate from .permissions import MyPermission from rest_framework.views import APIView from rest_framework.decorators import action import uuid from rest_framework.response import Response from rest_framework.decorators import permission_classes,throttle_classes,authentication_classes class BookView(ViewSetMixin, ListAPIView, RetrieveAPIView): queryset = Book.objects.all() serializer_class = BookSerializer class BookLoginView(ViewSetMixin, CreateAPIView, UpdateAPIView): queryset = Book.objects.all() serializer_class = BookSerializer authentication_classes = [Myauthenticate] class BookSuperView(ViewSetMixin, DestroyAPIView): queryset = Book.objects.all() serializer_class = BookSerializer authentication_classes = [Myauthenticate] permission_classes = [MyPermission] class UserView(ViewSetMixin, APIView): @action(methods=['POST'], detail=False) def login(self, request): username = request.data.get('username', None) password = request.data.get('password', None) user = User.objects.filter(username=username, password=password).first() if user: token = str(uuid.uuid4()) UserToken.objects.update_or_create(user=user, defaults={'token': token}) return Response({'code': 100, 'msg': '登录成功', 'token': token}) else: return Response({'code': 101, 'msg': '用户名或密码错误'}) ``` authentication.py ```python from rest_framework.authentication import BaseAuthentication from .models import User, UserToken from rest_framework.exceptions import AuthenticationFailed class Myauthenticate(BaseAuthentication): def authenticate(self, request): token = request.query_params.get('token', None) if token: user_token = UserToken.objects.filter(token=token).first() if user_token: return user_token.user, token else: raise AuthenticationFailed("您的token不正确") else: raise AuthenticationFailed('对不起您未携带token') ``` permission.py ```python from rest_framework.permissions import BasePermission from .models import User class MyPermission(BasePermission): def has_permission(self, request, view): user = request.user if user.usertype == 3: return True else: self.message = '对不起你是%s无法进行删除操作' % user.get_usertype_display() return False ``` Throttling.py ```python from rest_framework.throttling import SimpleRateThrottle class MyThrottling(SimpleRateThrottle): scope = 'book_10_m' def get_cache_key(self, request, view): ip = request.META.get('REMOTE_ADDR') return ip ``` serializer.py ```python from rest_framework import serializers from .models import Book class BookSerializer(serializers.ModelSerializer): class Meta: model = Book fields = ['id', 'name', 'price', 'publish', 'authors', 'authors_detail', 'publish_detail'] extra_kwargs = { 'publish': {'write_only': True}, 'authors': {'write_only': True}, 'authors_detail': {'read_only': True}, 'publish_detail': {'read_only': True}, } # authors = serializers.IntegerField(write_only=True) # 可以传空置的时候使用 ``` models.py ```python from django.db import models # Create your models here. class Book(models.Model): name = models.CharField(max_length=32) price = models.IntegerField() publish = models.ForeignKey(to='Publish', on_delete=models.CASCADE, null=True) authors = models.ManyToManyField(to='Author', default=None) @property def authors_detail(self): return [{'name': author.name, 'age': author.age, 'phone': author.authorDetail.phone, 'addr': author.authorDetail.addr} for author in self.authors.all()] @property def publish_detail(self): return {'name': self.publish.name, 'addr': self.publish.addr} class Publish(models.Model): name = models.CharField(max_length=32) addr = models.CharField(max_length=32) class Author(models.Model): name = models.CharField(max_length=32) age = models.IntegerField() authorDetail = models.OneToOneField(to='AuthorDetail', on_delete=models.CASCADE, null=True) class AuthorDetail(models.Model): phone = models.CharField(max_length=32) addr = models.CharField(max_length=32) class User(models.Model): username = models.CharField(max_length=32) password = models.CharField(max_length=32) usertype = models.IntegerField(choices=((1, '游客用户'), (2, '普通用户'), (3, '超级管理')), default=1) # 1游客用户,2普通用户,3超级管理员 class UserToken(models.Model): token = models.CharField(max_length=32) user = models.OneToOneField(to='User', on_delete=models.CASCADE, null=True) ``` ```python # 三种过滤方式实现能够搜索图书,带排序 ``` 进阶练习 ```python -继承BaseThrottle,重写allow_request,实现按ip,一分钟只能访问3次 #(1)取出访问者ip #(2)判断当前ip不在访问字典里,添加进去,并且直接返回True,表示第一次访问,在字典里,继续往下走 #(3)循环判断当前ip的列表,有值,并且当前时间减去列表的最后一个时间大于60s,把这种数据pop掉,这样列表中只有60s以内的访问时间, #(4)判断,当列表小于3,说明一分钟以内访问不足三次,把当前时间插入到列表第一个位置,返回True,顺利通过 #(5)当大于等于3,说明一分钟内访问超过三次,返回False验证失败 ``` ```python # 基于APIView写分页 ``` 最后修改:2023 年 02 月 09 日 10 : 24 PM © 允许规范转载 赞赏 如果觉得我的文章对你有用,请随意赞赏 ×Close 赞赏作者 扫一扫支付
此处评论已关闭